 Save
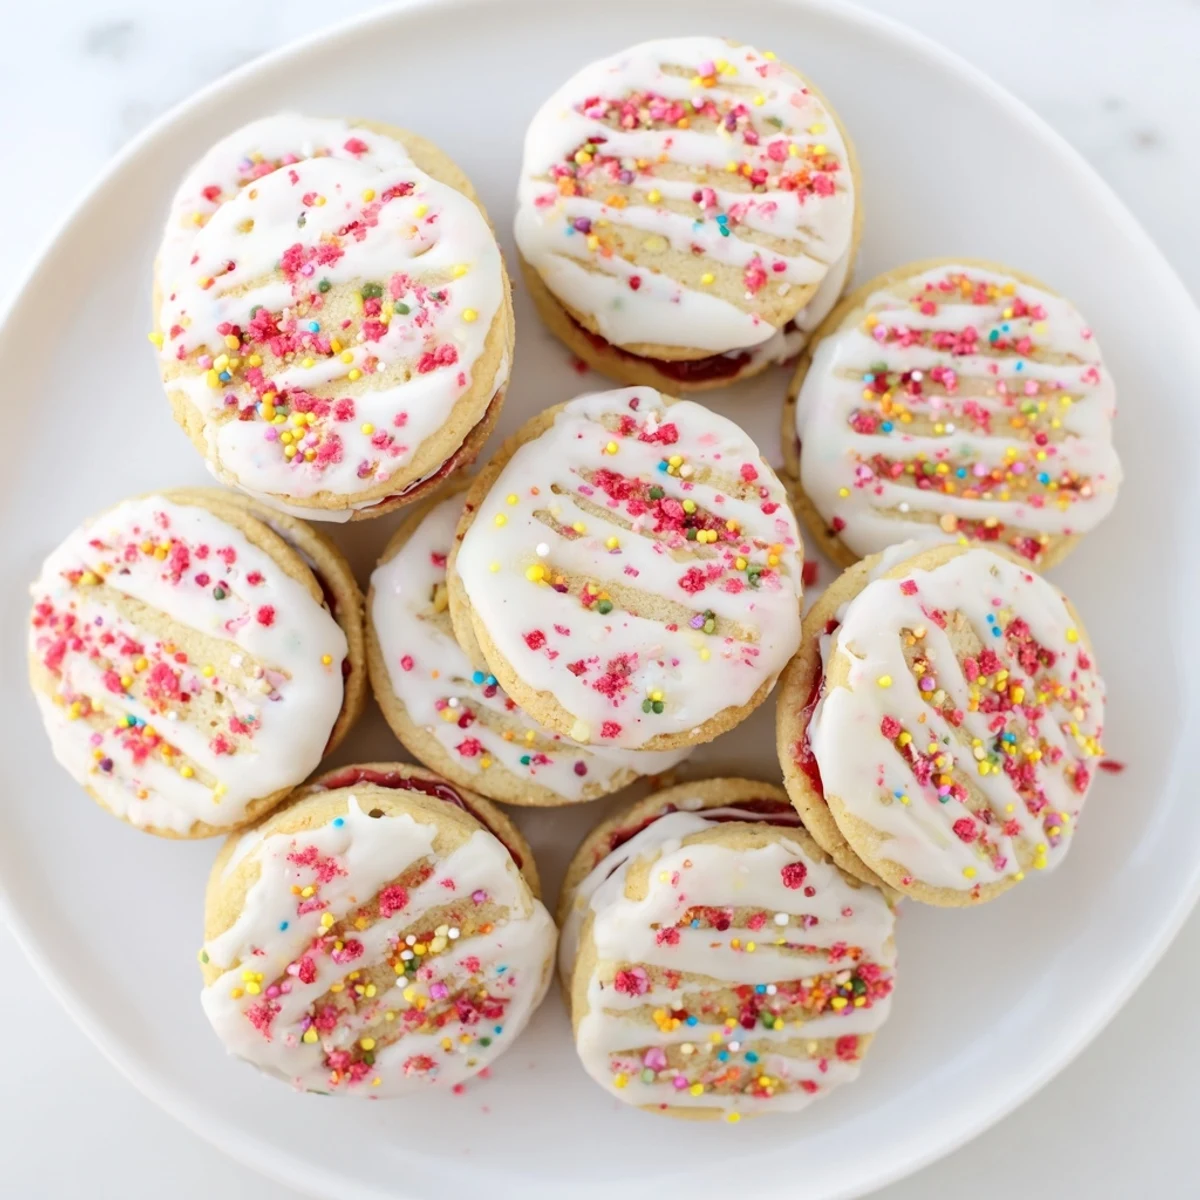
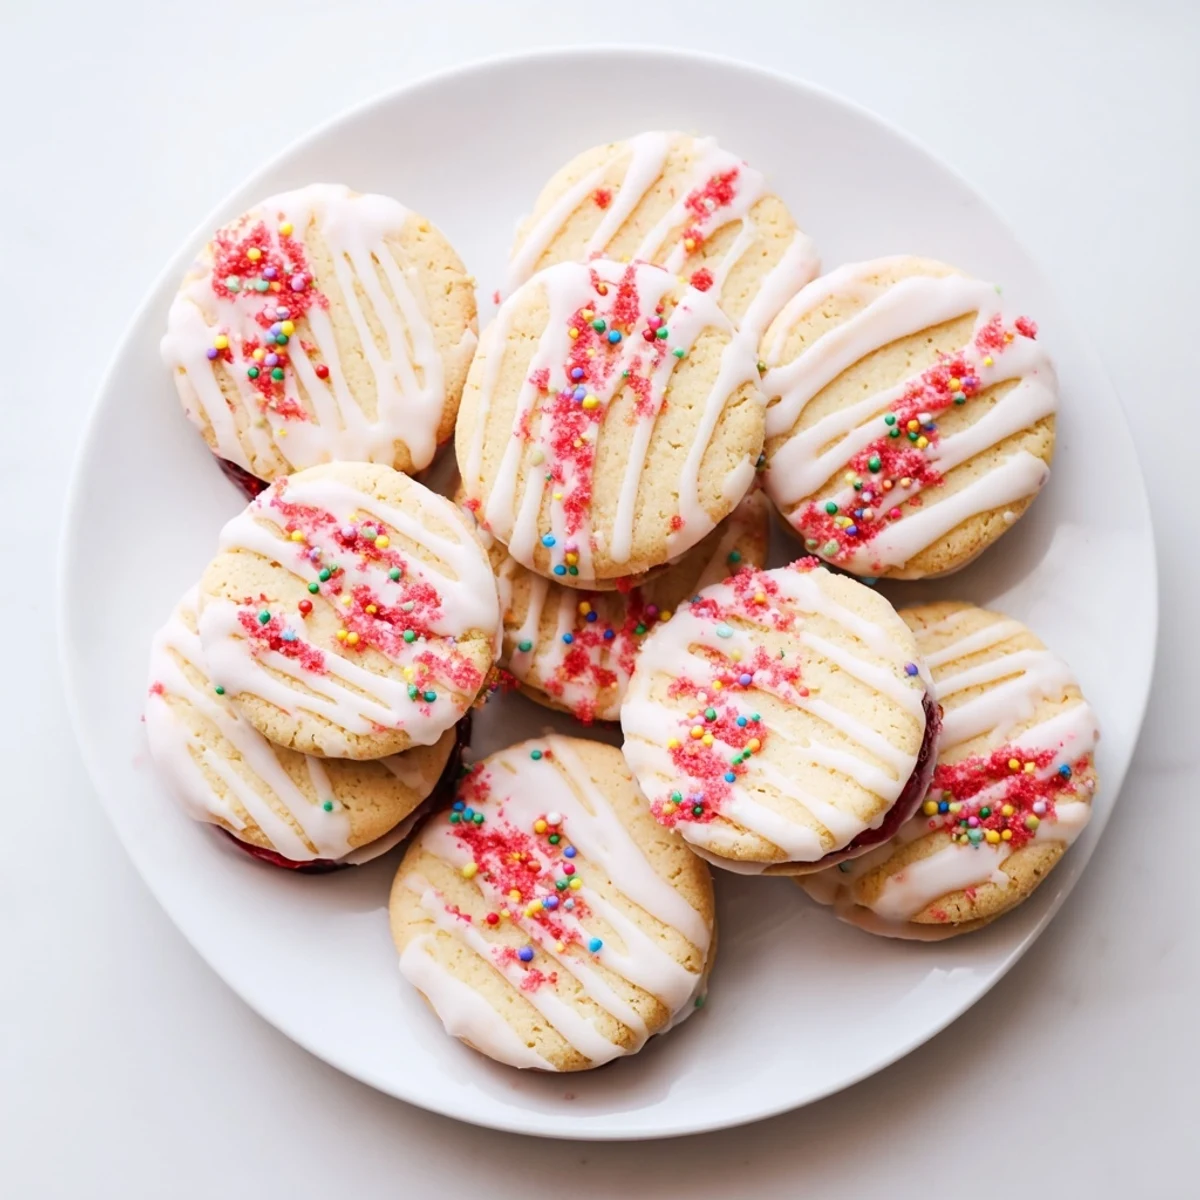
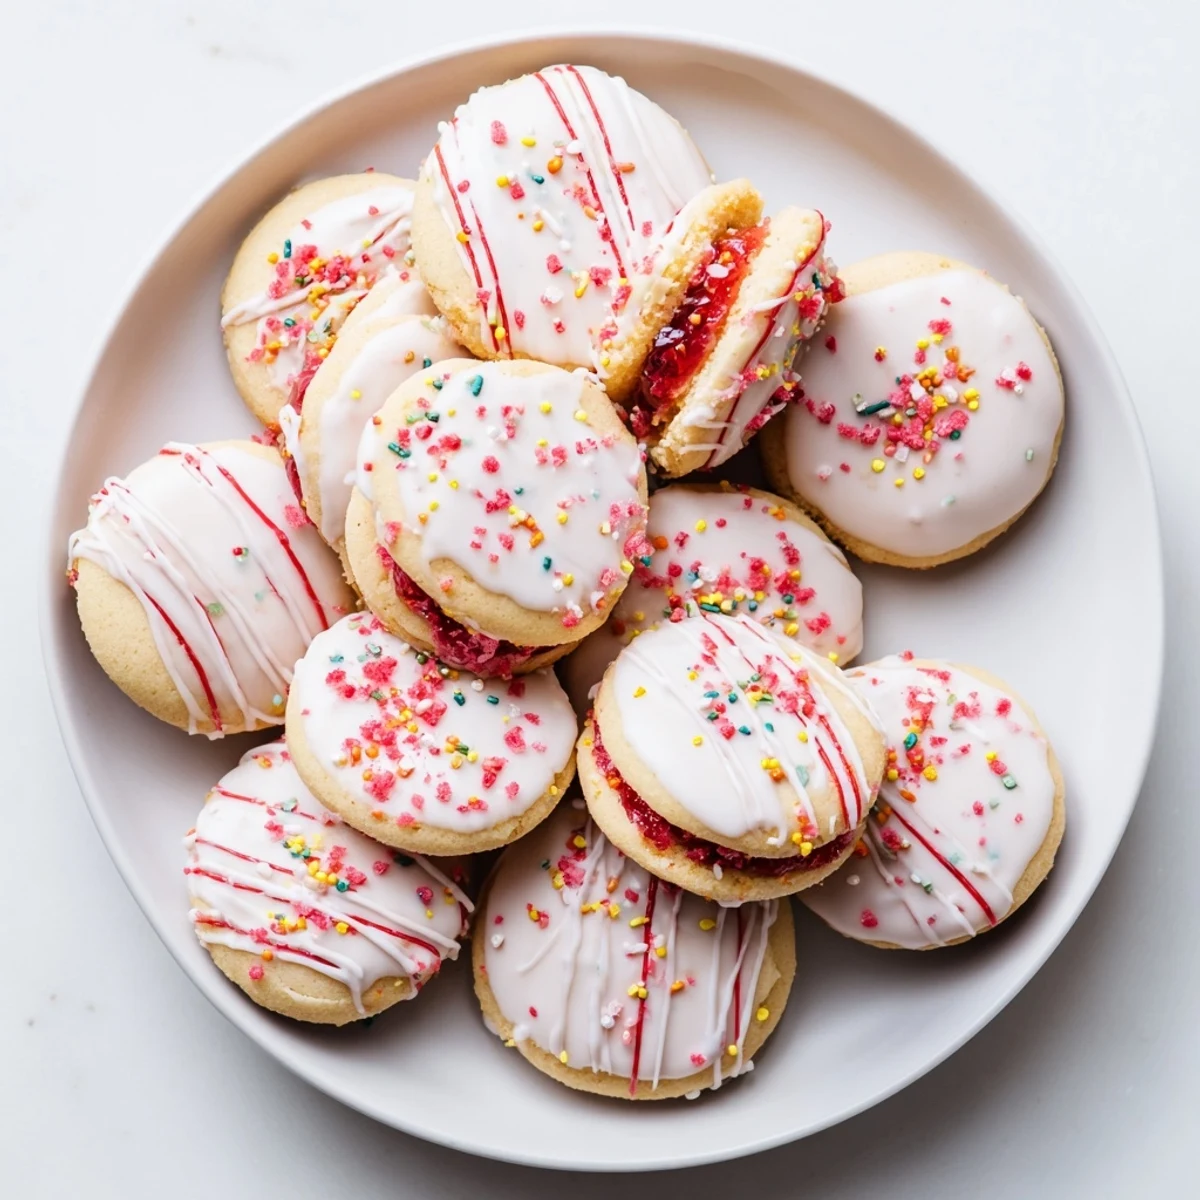
Save These soft sugar cookies bring nostalgic Pop Tart flavors to your baking routine. Each cookie features a buttery, vanilla-infused dough wrapped around a center of sweet strawberry jam. After baking until golden, the treats are crowned with a smooth vanilla glaze and optional crushed freeze-dried strawberries or sprinkles for that signature colorful finish.
The dough comes together quickly with creamed butter and sugar, while the jam filling adds bursts of fruity sweetness in every bite. Perfect for dessert, snack time, or lunchbox treats, these cookies stay fresh for days and freeze beautifully for later enjoyment.
The summer my youngest niece visited, she spotted a box of strawberry Pop Tarts in the pantry and declared them the greatest food ever invented, which sent me down a rabbit hole of wondering what would happen if those toaster pastry vibes landed inside a soft sugar cookie. Three batches later, we had something that made her eyes go wide and convinced the rest of the family that kitchen experiments are always worth the mess. These strawberry Pop Tart cookies are buttery, jam filled little clouds with a sweet glaze on top, and they somehow taste like childhood and a bakery had a baby.
I packed a tin of these for a neighborhood potluck and they vanished before the main dishes even made it to the table, which told me everything I needed to know about their crowd appeal.
Ingredients
- All-purpose flour (2 1/2 cups, 315 g): The backbone of the cookie, giving it that tender structure without turning tough.
- Baking powder (1/2 teaspoon): Just enough lift to keep these soft and pillowy rather than flat and crispy.
- Salt (1/2 teaspoon): A small pinch that makes every sweet note taste more balanced and intentional.
- Unsalted butter, softened (3/4 cup, 170 g): Room temperature butter is non negotiable here because cold butter will not cream properly and your cookies will spread unevenly.
- Granulated sugar (1 cup, 200 g): Gives the dough its sweetness and helps those edges turn just golden in the oven.
- Large egg (1): Binds everything together and adds richness to the crumb.
- Vanilla extract (2 teaspoons): Use the real stuff if you can because imitation vanilla will flatten the flavor of the whole batch.
- Strawberry jam, seedless preferred (1/2 cup, 160 g): The fruity heart of each cookie, and seedless keeps the texture smooth and surprise filled.
- Powdered sugar (1 cup, 120 g): For the glaze that makes these look like tiny works of art.
- Milk (1 to 2 tablespoons): Thins the glaze to the perfect drizzling consistency, so add it slowly and stop when it looks right.
- Vanilla extract for glaze (1/2 teaspoon): A second hit of vanilla in the topping rounds out the sweetness beautifully.
- Freeze-dried strawberries, crushed (2 tablespoons, optional): Adds a tangy crunch on top that makes people ask what your secret is.
- Colorful sprinkles (optional): Pure joy in decorative form, especially if kids are anywhere near the kitchen.
Instructions
- Preheat and prepare your pans:
- Set your oven to 350 degrees F (175 degrees C) and line two baking sheets with parchment paper so nothing sticks and cleanup is effortless.
- Whisk the dry ingredients together:
- In a medium bowl, whisk the flour, baking powder, and salt until evenly blended, then set it aside while you work on the butter mixture.
- Cream the butter and sugar:
- In a large bowl, beat the softened butter and granulated sugar with an electric mixer on medium speed until the mixture turns pale, light, and fluffy, which takes about 3 minutes and is worth every second.
- Add the egg and vanilla:
- Beat in the egg and vanilla extract until everything is well combined and the dough looks smooth and glossy.
- Bring the dough together:
- Gradually mix in the dry ingredients on low speed until a soft dough forms, stopping as soon as the last streak of flour disappears to avoid overworking it.
- Shape and fill the cookies:
- Scoop 2 tablespoon portions of dough and roll them into balls, then flatten each slightly in your palm, spoon 1/2 teaspoon of strawberry jam into the center of half the rounds, and top each with another dough round before pinching the edges to seal and gently flattening so the jam stays tucked inside.
- Arrange and bake:
- Place the sealed cookie shells on your prepared sheets about 2 inches apart and bake for 12 to 13 minutes until the edges are just turning golden, then let them rest on the sheet for 5 minutes before moving to a wire rack to cool completely.
- Make the glaze and finish:
- Whisk the powdered sugar, milk, and vanilla until smooth and thick but still pourable, then drizzle or spread it over the cooled cookies and sprinkle with crushed freeze-dried strawberries or colorful sprinkles before the glaze sets.
 Save
Save The afternoon we sat on the back porch with a plate of these still slightly warm, milk poured into mismatched glasses, felt like the kind of simple perfect moment you wish you could bottle and keep forever.
Playing With Different Fillings
Strawberry jam is where I started, but raspberry and blueberry both work beautifully, and once I even tried lemon curd which turned these into something almost elegant enough for a brunch table. The key is using something thick enough that it does not run everywhere when you seal the dough, so if your jam is very loose, simmer it for a few minutes to concentrate it first. Nutella is another option that will make children lose their minds with happiness.
Getting The Glaze Just Right
The glaze should be thick enough to sit on top of the cookie without sliding right off, but thin enough that you can spread it with the back of a spoon without tearing the cookie underneath. Add milk literally a half teaspoon at a time because it is much easier to thin a thick glaze than to fix one that turned into a puddle. A drop or two of food coloring can turn these into festive treats for any holiday on the calendar.
Storing And Sharing
These keep beautifully in an airtight container at room temperature for up to 4 days, though in my house they rarely survive past day two because someone always sneaks one with their morning coffee. The glaze sets firm after about an hour, which makes them safe to stack and pack into tins for gifting. If you want to freeze them, do it before adding the glaze and then finish them fresh when you are ready to serve.
- Always let the cookies cool completely before glazing or the heat will melt the topping right off.
- Parchment paper under the glazed cookies saves you from scrubbing dried sugar off every surface in your kitchen.
- These are best shared with people who appreciate the little things, because that is exactly what they are.
 Save
Save However you make them and whoever you share them with, these little cookies have a way of turning an ordinary afternoon into something worth remembering.
Recipe FAQs
- → Can I use different jam flavors?
-
Absolutely. Raspberry, blueberry, or apricot jam work wonderfully. Just ensure it's seedless for the smoothest texture inside the cookies.
- → How should I store these cookies?
-
Keep in an airtight container at room temperature for up to 5 days. For longer storage, freeze undecorated cookies for up to 3 months and add glaze after thawing.
- → Why did my jam leak during baking?
-
This happens if the dough edges aren't sealed properly or the cookies are overfilled. Use only 1/2 teaspoon jam per cookie and pinch the edges firmly to create a tight seal.
- → Can I make the dough ahead of time?
-
Yes. Refrigerate the dough for up to 2 days before baking. Let it soften slightly at room temperature for 15-20 minutes before shaping and filling.
- → What's the best way to crush freeze-dried strawberries?
-
Place them in a zip-top bag and crush with a rolling pin or meat mallet. The fine powder adds intense strawberry flavor and beautiful color to the glaze.
- → Can I skip the glaze?
-
The glaze adds sweetness and helps the sprinkles adhere, but these cookies are delicious without it. Simply dust with powdered sugar or enjoy plain.