 Save
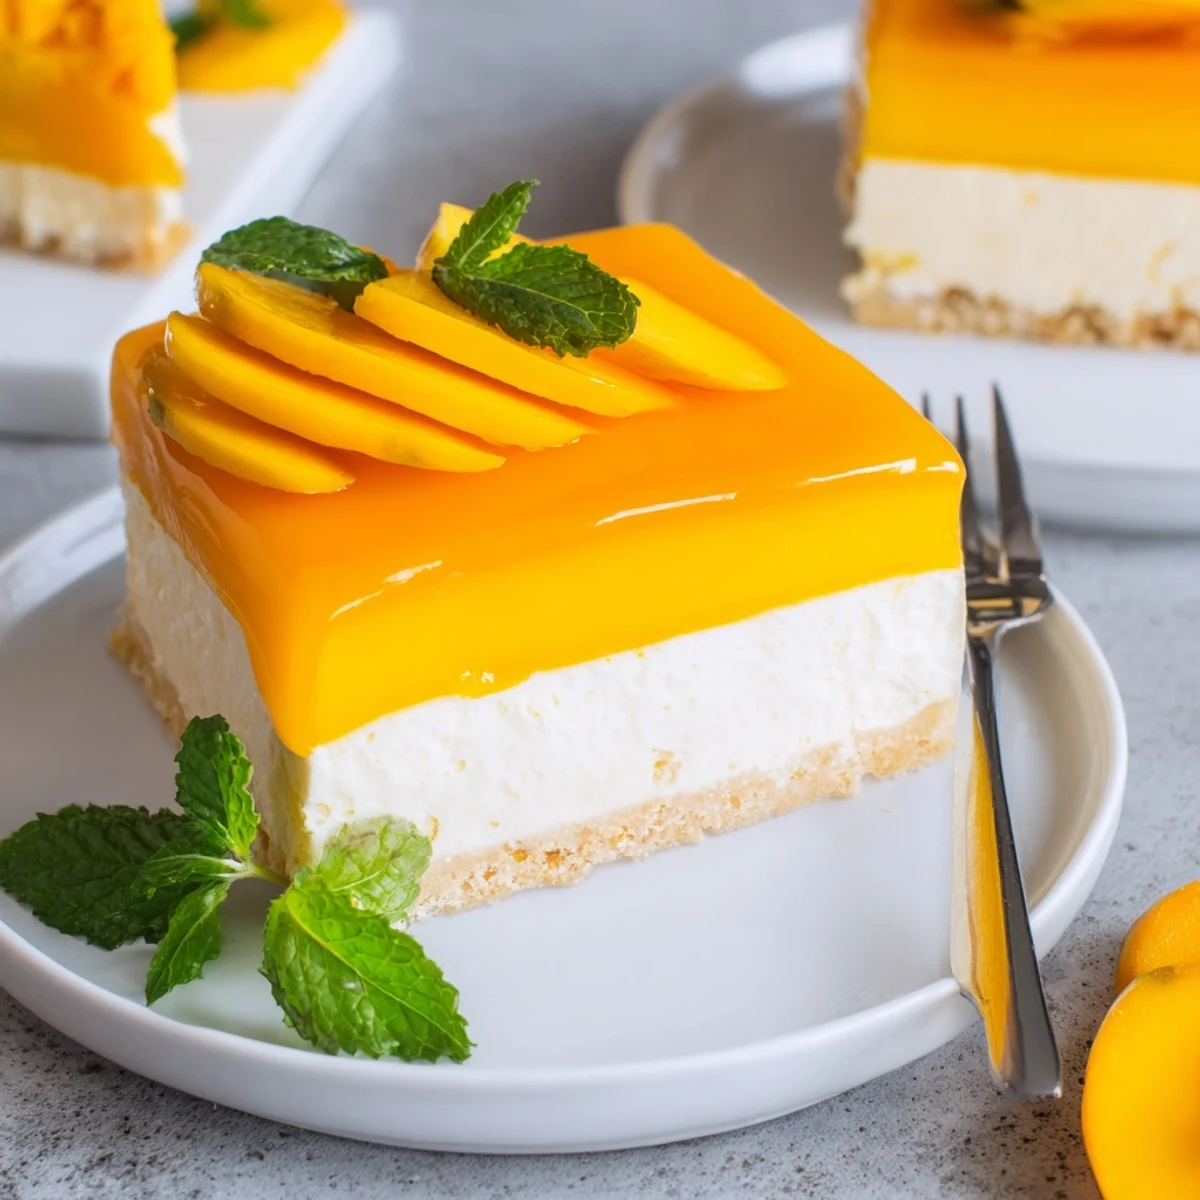
Save This elegant mango mousse cake combines three delightful layers: a tender vanilla sponge base, a fluffy mango mousse made with fresh ripe mangoes and whipped cream, and a glossy mango glaze finish. The dessert requires patience with chilling time but rewards you with a stunning presentation and refreshing tropical flavors.
The sponge provides a stable foundation, while the mousse layer delivers an airy, creamy texture bursting with natural mango sweetness. The final glaze creates a professional bakery finish that glistens beautifully. Perfect for warm weather entertaining, this make-ahead dessert serves 10 and pairs wonderfully with sparkling wine or Moscato d'Asti.
The summer my sister got married, I somehow convinced myself I should contribute something to the reception dessert table despite having zero formal pastry training. This mango mousse cake was that terrifying yet wonderful experiment, born from an obsession with mango season and sheer determination to not embarrass myself. The moment I sliced into it at the venue and saw those perfect layers hold their shape, I actually whispered yes to myself under my breath. Now it's the cake everyone requests for birthdays instead of the usual vanilla classics.
Last summer my neighbor Sarah came over while I was folding the whipped cream into the mango mixture. She stood there watching me work, licking mango puree off a spoon, and declared this was the dessert that would finally make her husband like mangoes anything. Two days later she texted me a photo of an empty cake stand and said he was already asking when I'd make another one.
Ingredients
- 3 large eggs at room temperature: Cold eggs won't whip up properly and your sponge will be dense instead of light and airy
- 90 g granulated sugar: This precise amount sweetens and stabilizes the egg foam without making it overly sweet
- 90 g all-purpose flour: Sift this first to avoid any stubborn lumps in your delicate sponge
- 1/2 tsp vanilla extract: Pure vanilla makes the sponge taste like something from a proper bakery
- Pinch of salt: Balances sweetness and enhances all the other flavors
- 400 g ripe mango flesh pureed: The sweetest mangoes you can find will determine how incredible this cake tastes
- 60 g granulated sugar: Adjust slightly depending on how sweet your mangoes are naturally
- 2 tbsp lemon juice: Brightens the mango flavor and cuts through the richness
- 1 tbsp unflavored gelatin powder: This is what gives the mousse that gorgeous silky structure
- 300 ml cold heavy cream: The colder your cream the faster and better it whips to soft peaks
- 150 g mango puree: Use your smoothest puree for a mirror like glaze finish
- 1 tbsp lemon juice: Keeps the glaze from being too sweet and adds shine
- 1 tbsp granulated sugar: Just enough to balance the tartness for the topping
- 1.5 tsp unflavored gelatin powder: Ensures your glaze sets firm enough to slice cleanly
- Fresh mango slices and mint leaves: These make the cake look like it came from a fancy patisserie window
Instructions
- Bake the foundation:
- Preheat your oven to 180°C (350°F) and line only the bottom of a 23 cm springform pan with parchment paper. Whip eggs and sugar until pale and tripled in volume then gently fold in flour salt and vanilla. Bake for 12 to 15 minutes until a toothpick comes out clean then let cool completely in the pan.
- Prepare the mango filling:
- Sprinkle gelatin over 3 tbsp cold water and let it bloom for 5 minutes until it looks like tiny soft jewels. Warm it gently until dissolved then blend mango puree sugar and lemon juice until completely smooth. Stir in the gelatin mixture.
- Make it mousse:
- Whip cold heavy cream to soft peaks watching carefully so you do not overwhip it into butter. Gently fold the whipped cream into the mango mixture in thirds keeping it light and airy. Pour over your cooled sponge base and refrigerate for at least 2 hours.
- Create the mirror glaze:
- Bloom your remaining gelatin in 2 tbsp cold water then warm until dissolved. Mix mango puree lemon juice and sugar until combined then stir in the gelatin. Let it cool to room temperature like a patient baker then pour evenly over the set mousse.
- The final chill:
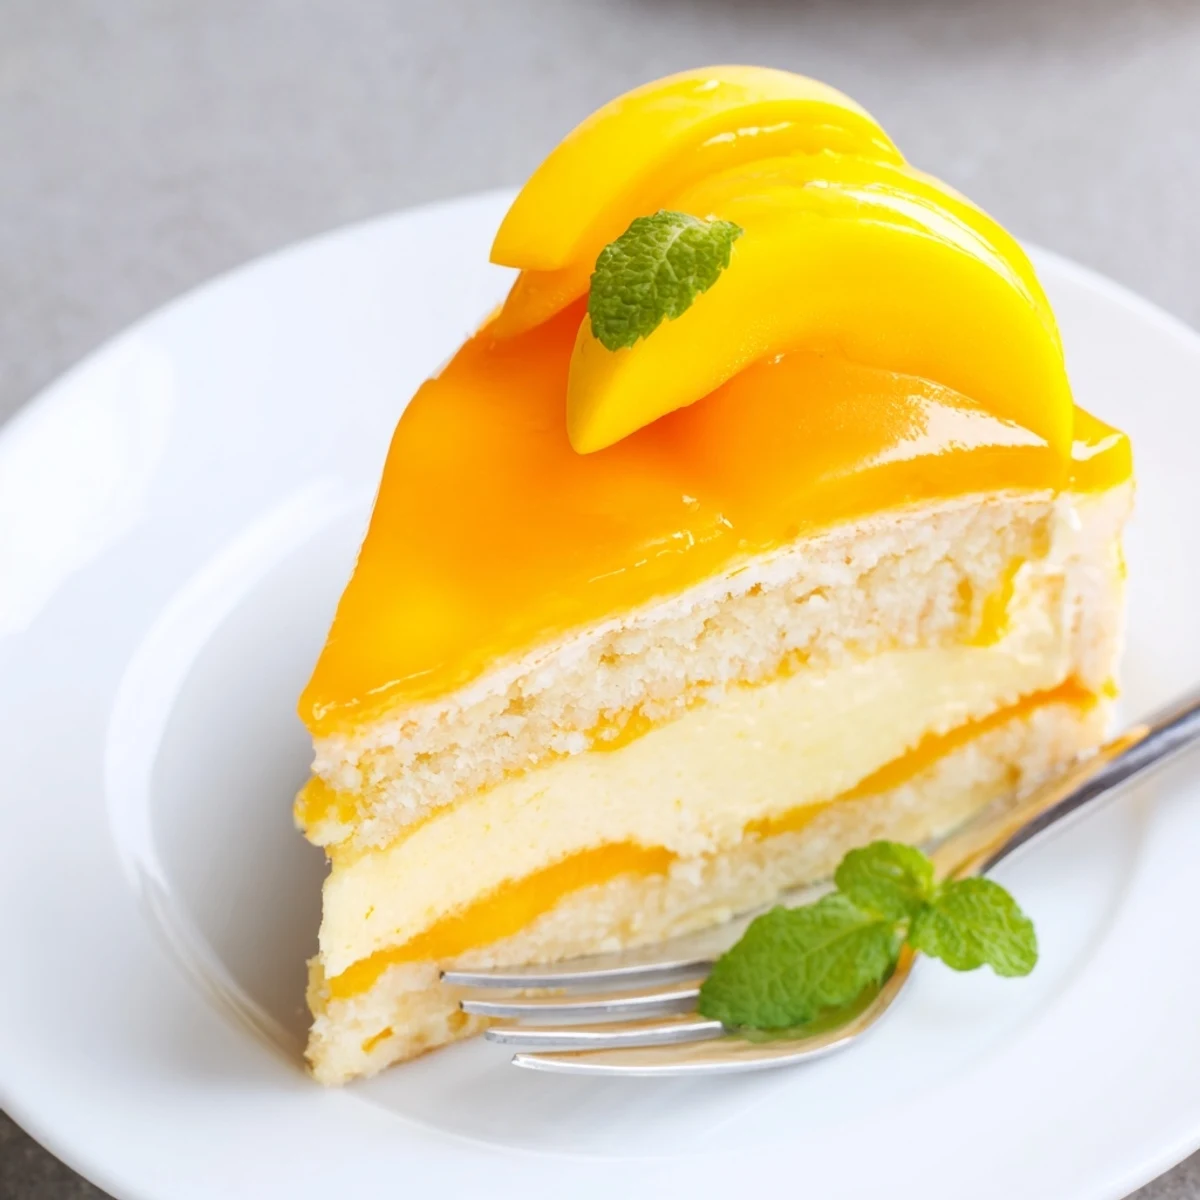
- Refrigerate the cake for at least 2 more hours until the glaze feels firm to the touch. Run a thin knife around the edge of the pan then release the springform ring with confidence. Decorate with fresh mango slices and mint if you are feeling fancy then slice and serve cold.
 Save
Save This cake made an unexpected appearance at my book club meeting last month when I forgot it was my turn to host dessert. Everyone went quiet after the first bite and someone actually asked if I had secretly ordered it from a bakery. The best part was watching skeptical mango haters become converts with just one forkful.
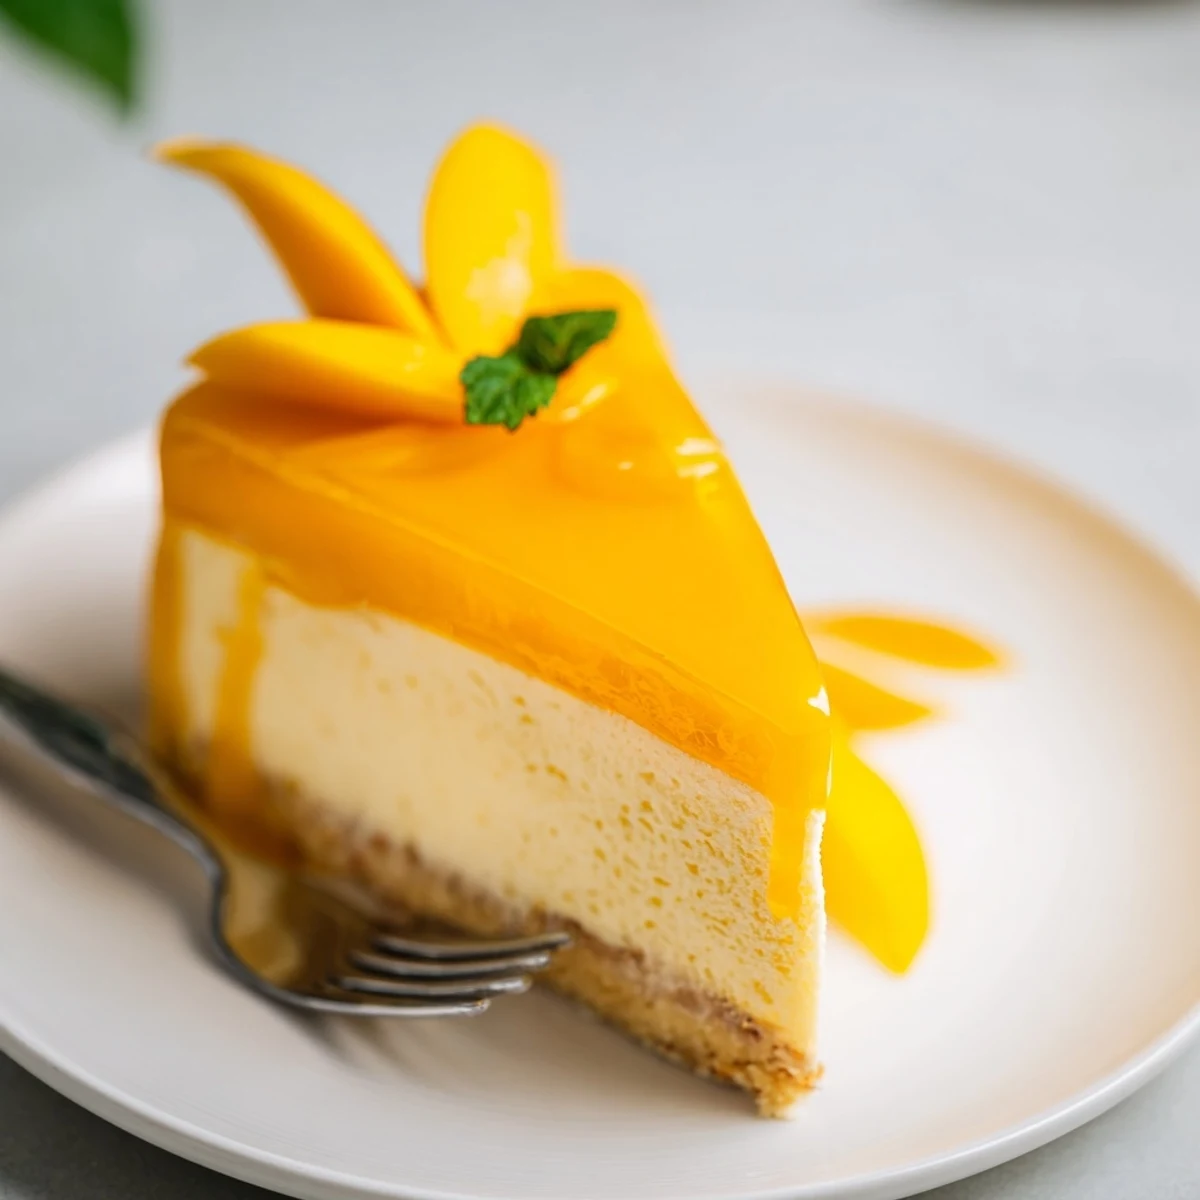
Mastering The Sponge Layer
Your sponge base is literally the foundation that everything else relies upon so do not rush the beating process. When the egg mixture triples in volume and leaves ribbons when you lift the beaters you have reached the perfect stage. Gently folding in the flour by hand preserves all those precious air bubbles you just worked so hard to create.
Getting The Mousse Texture Right
The secret to restaurant quality mousse is folding the whipped cream in thirds rather than dumping it all in at once. This technique maintains air pockets while ensuring everything gets incorporated evenly. You are looking for a texture that feels like silk between your fingers not something loose or watery.
Creating That Perfect Glaze Finish
The difference between a homemade look and a professional finish comes down to glaze temperature and patience. Let it cool until it feels slightly thickened but still pourable like warm honey. Working quickly once you start pouring helps achieve that even glass like surface that makes people gasp when they see your cake.
- Tap the pan gently on the counter after pouring glaze to release any trapped air bubbles
- If you notice stubborn bubbles pop them immediately with the tip of a sharp knife
- Let the glazed cake set uncovered in the fridge to maintain that glossy finish
 Save
Save Every time I make this cake now I think about how fear of failure almost kept me from trying something new in the kitchen. Sometimes the most rewarding recipes come from moments when you decide to just go for it anyway.
Recipe FAQs
- → Can I use frozen mangoes instead of fresh?
-
Yes, you can substitute high-quality frozen mango chunks. Thaw them completely and drain any excess liquid before pureeing. The texture and flavor will still be delicious, though fresh mangoes provide the brightest taste.
- → How long does the mango mousse cake need to chill?
-
The mousse layer requires at least 2 hours to set properly in the refrigerator. After adding the glaze, chill for an additional 2 hours until firm. For best results, you can prepare it the night before and let it set overnight.
- → Can I make this mango mousse cake gluten-free?
-
Absolutely. Simply replace the all-purpose flour in the sponge base with a gluten-free flour blend. The rest of the ingredients are naturally gluten-free, making this an easy adaptation for those with dietary restrictions.
- → What size springform pan do I need?
-
A 23 cm (9-inch) springform pan works perfectly for this mango mousse cake. The removable sides make it easy to release the finished dessert without damaging the delicate mousse and glaze layers.
- → How should I store the finished mango mousse cake?
-
Store the cake in the refrigerator, covered loosely with plastic wrap or in a cake container. It will keep for 3-4 days when properly chilled. The texture remains excellent, making it ideal for preparing ahead of time for gatherings.
- → Can I substitute gelatin with something else?
-
For vegetarians, agar-agar can replace gelatin, though the setting properties differ slightly. Use approximately 1 teaspoon of agar-agar powder for each tablespoon of gelatin called for in the mousse and glaze.