 Save
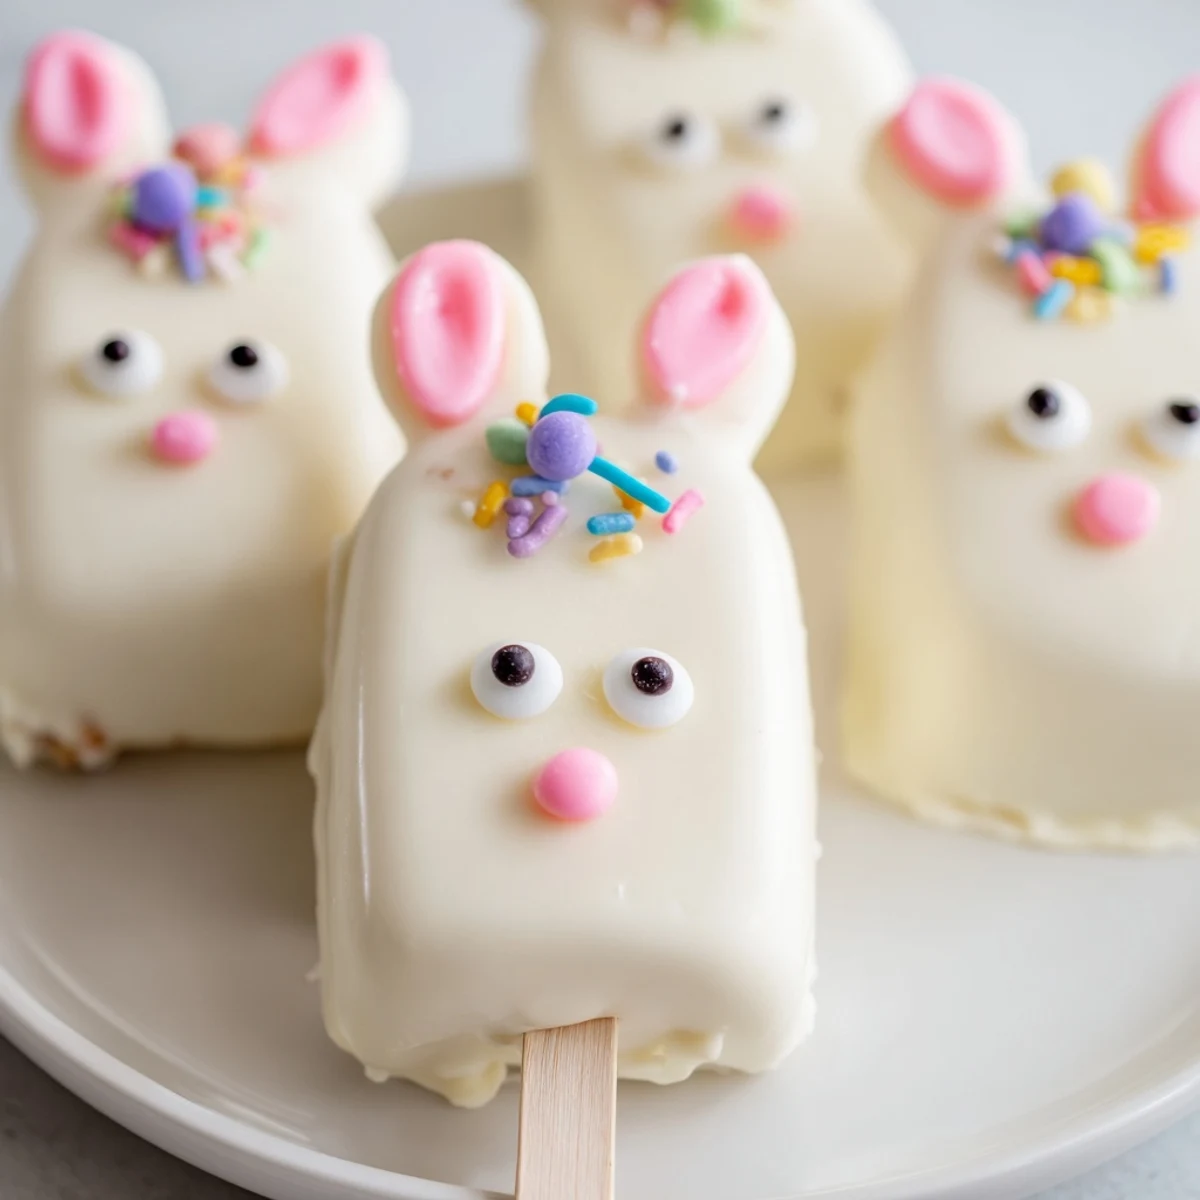
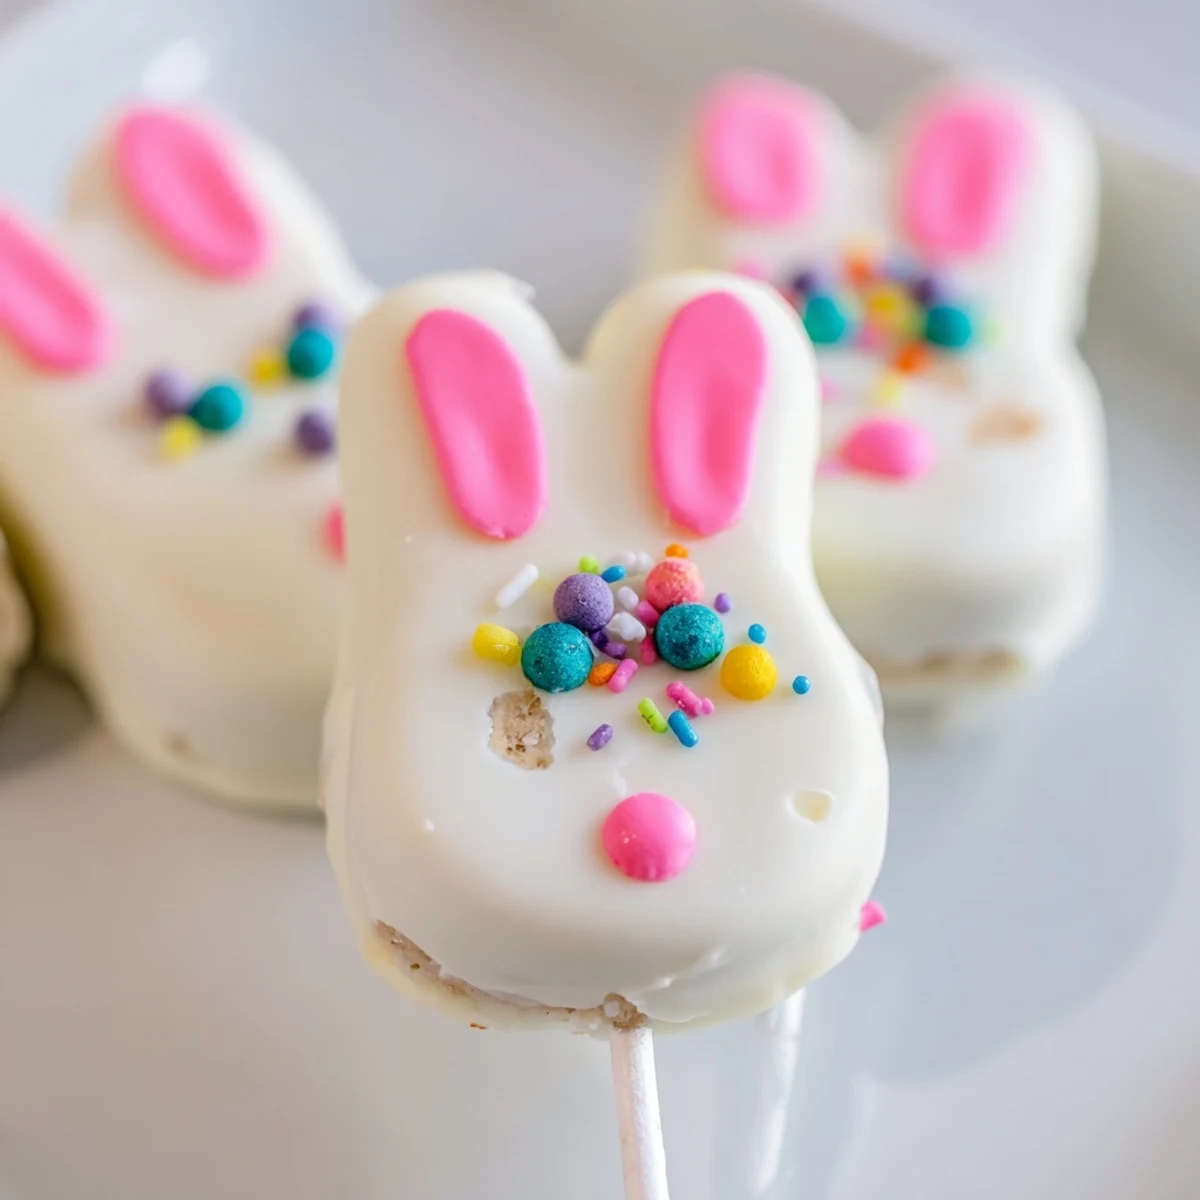
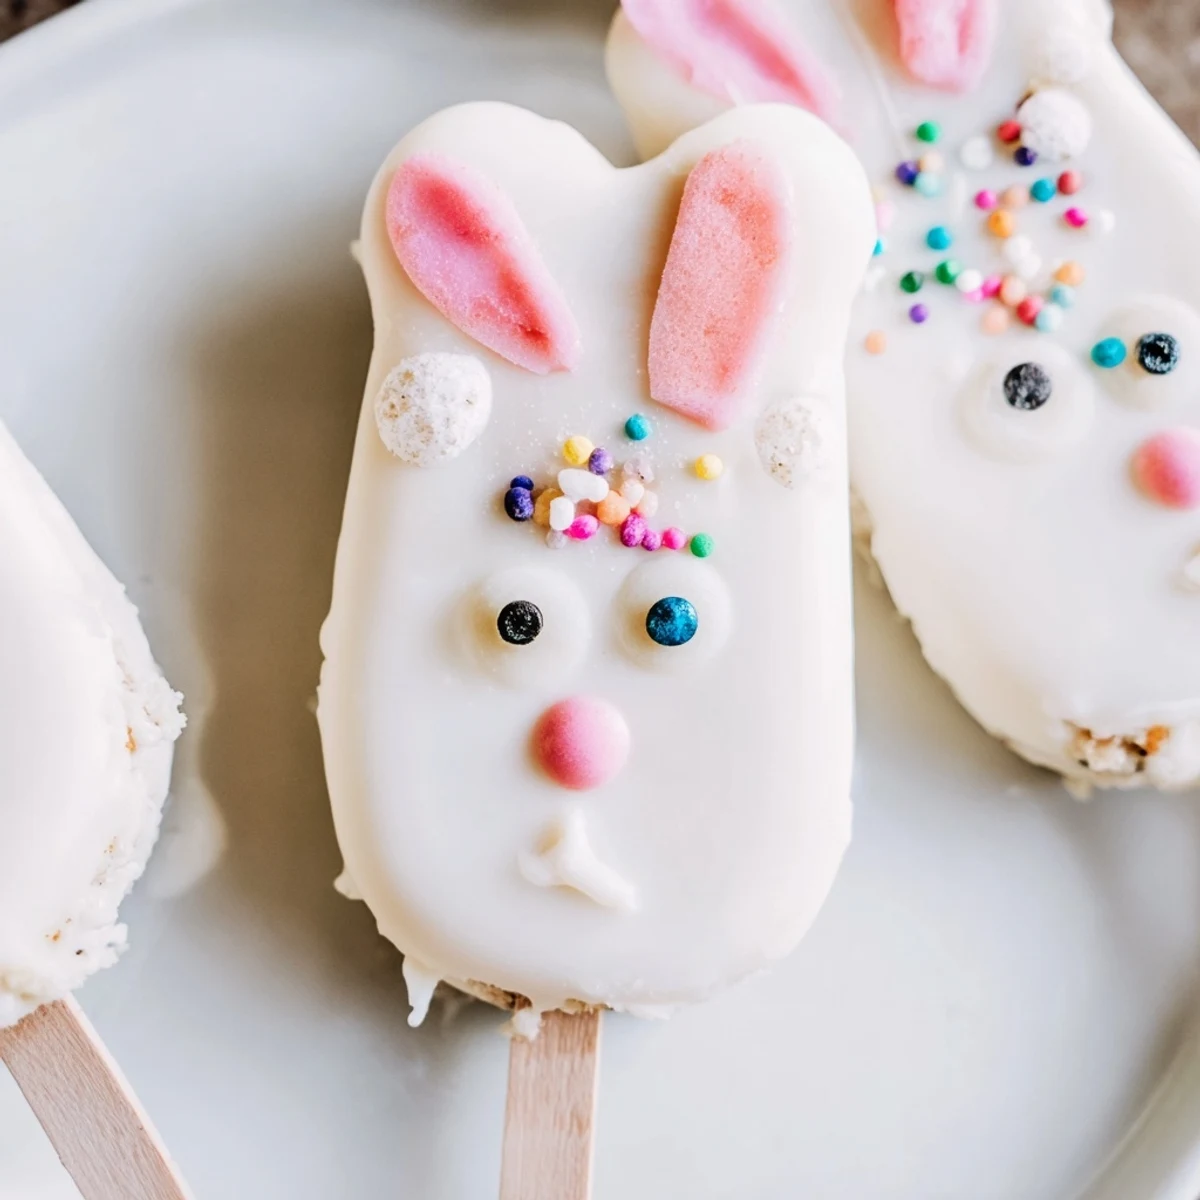
Save These delightful bunny-shaped treats combine moist vanilla cake crumbs with cream cheese and butter, creating a perfect dough that holds its shape. Each portion is formed into an adorable bunny face, then dipped in smooth white chocolate for a creamy exterior. Decorate with candy eyes, sprinkles, or fondant ears to bring these festive treats to life. The result is a handheld dessert that's both visually charming and delicious—ideal for Easter gatherings, spring parties, or as a fun cooking activity with family.
The kitchen counter looked like a pastel explosion had been contained entirely within one mixing bowl. My daughter had been begging me to make something extra for her class Easter party, and these bunny cakesicles kept popping up on my social media feed. I figured how hard could it be, right? Famous last words from someone who ended up with white chocolate splattered across three countertops and somehow in her hair.
Last Easter morning, I made a double batch while wearing my pajamas and listening to old Motown records. Something about dipping cake into melted chocolate while dancing to My Girl just felt right. My husband walked in, took one look at the counter, and asked if a bakery had exploded in our kitchen. But when he tried one later? Gone in three bites flat.
Ingredients
- Vanilla cake crumbs: I have used everything from leftover birthday cake to store bought cupcakes and they all work perfectly
- Cream cheese: Make sure this is properly softened or you will get lumps in your cake mixture that nobody wants
- Unsalted butter: Room temperature is non negotiable here, cold butter will fight you every step of the way
- Powdered sugar: This sweetens the cake mixture slightly while helping everything bind together like magic
- Vanilla extract: Pure vanilla makes a noticeable difference in the final flavor profile
- White chocolate: Candy melts are easier to work with but actual white chocolate tastes infinitely better
- Edible gel food coloring: Get the gel kind, not liquid, or your white chocolate will seize up and ruin your day
- Cakesicle sticks: These are thicker than regular cake pop sticks and absolutely necessary for stability
Instructions
- Make your cake mixture:
- Combine the cake crumbs, cream cheese, butter, powdered sugar and vanilla in a medium bowl. Mix with your hands until everything comes together into a dough that holds its shape when squeezed.
- Shape the bunnies:
- Divide the mixture into 8 equal portions and form each one into a flattened oval shape. Press a cakesicle stick about halfway into each shape, then place them on a parchment lined tray and refrigerate until firm, about 20 to 30 minutes.
- Melt the chocolate:
- Microwave the white chocolate in 30 second bursts, stirring between each interval until completely smooth. The chocolate should be fluid but not hot or your cakesicles will slide right off the sticks.
- Dip and decorate:
- Dip each cake shape into the chocolate, gently tap off the excess, then immediately add decorations before the coating sets. Let them harden completely before serving.
 Save
Save My niece now requests these for every single family gathering, Easter or not. She tells everyone that Auntie makes the magic bunny treats, which is either a compliment or suggests she thinks I am actually magical. Either way, I will take it.
Making Them Ahead
You can prepare the cake mixture and shape the bunnies up to two days in advance. Keep them refrigerated, tightly wrapped, then dip in chocolate the day you plan to serve them. This actually works better because the cake shapes are extra firm and less likely to crack during the dipping process.
Decoration Ideas That Work
Beyond the basic candy eyes and sprinkles, I have found that pretzel sticks make adorable floppy ears when dipped in pink chocolate. Fondant is another great option if you want to get creative with expressions. Some of my best looking bunnies came from raiding the Halloween candy stash for edible decorations.
Troubleshooting Common Problems
If your cakesicles keep sliding off the sticks, try dipping just the very end of the stick into melted chocolate before inserting it into the cake. This acts as glue once it hardens. Also, do not tap the stick too hard against the bowl edge when removing excess chocolate, or you will crack the coating.
- Work quickly once the chocolate is melted or it will start to thicken and become difficult to dip smoothly
- Keep your decorated cakesicles away from direct sunlight or warm surfaces until fully set
- If you make a mistake, let the chocolate harden completely, then gently chip it off and try again
 Save
Save These bunny cakesicles have become one of those recipes that people actually remember and ask for by name. Hope they bring as much joy to your Easter table as they have to mine.
Recipe FAQs
- → What are cakesicles?
-
Cakesicles are cake pops shaped like popsicles, made by combining cake crumbs with frosting to form a dough, shaping it, inserting a stick, and coating in chocolate or candy melts.
- → How long do these treats stay fresh?
-
Store in an airtight container in the refrigerator for up to 3 days. Bring to room temperature before serving for the best texture and flavor.
- → Can I use different cake flavors?
-
Absolutely! Chocolate, lemon, red velvet, or any cake flavor works wonderfully. Just ensure the crumbs are finely crushed for the best dough consistency.
- → Do I need a special mold?
-
No mold is required—you can hand-shape the dough into bunny faces. However, a cakesicle mold helps create uniform shapes and makes the process easier.
- → Why must the shaped cakes be chilled before dipping?
-
Chilling for 20-30 minutes firms the dough, preventing it from falling off the stick when dipped in warm melted chocolate or becoming misshapen during coating.
- → Can I make these ahead of time?
-
Yes! Prepare and coat up to 2 days in advance, then decorate just before serving to maintain the fresh appearance of decorations and sprinkles.