 Save
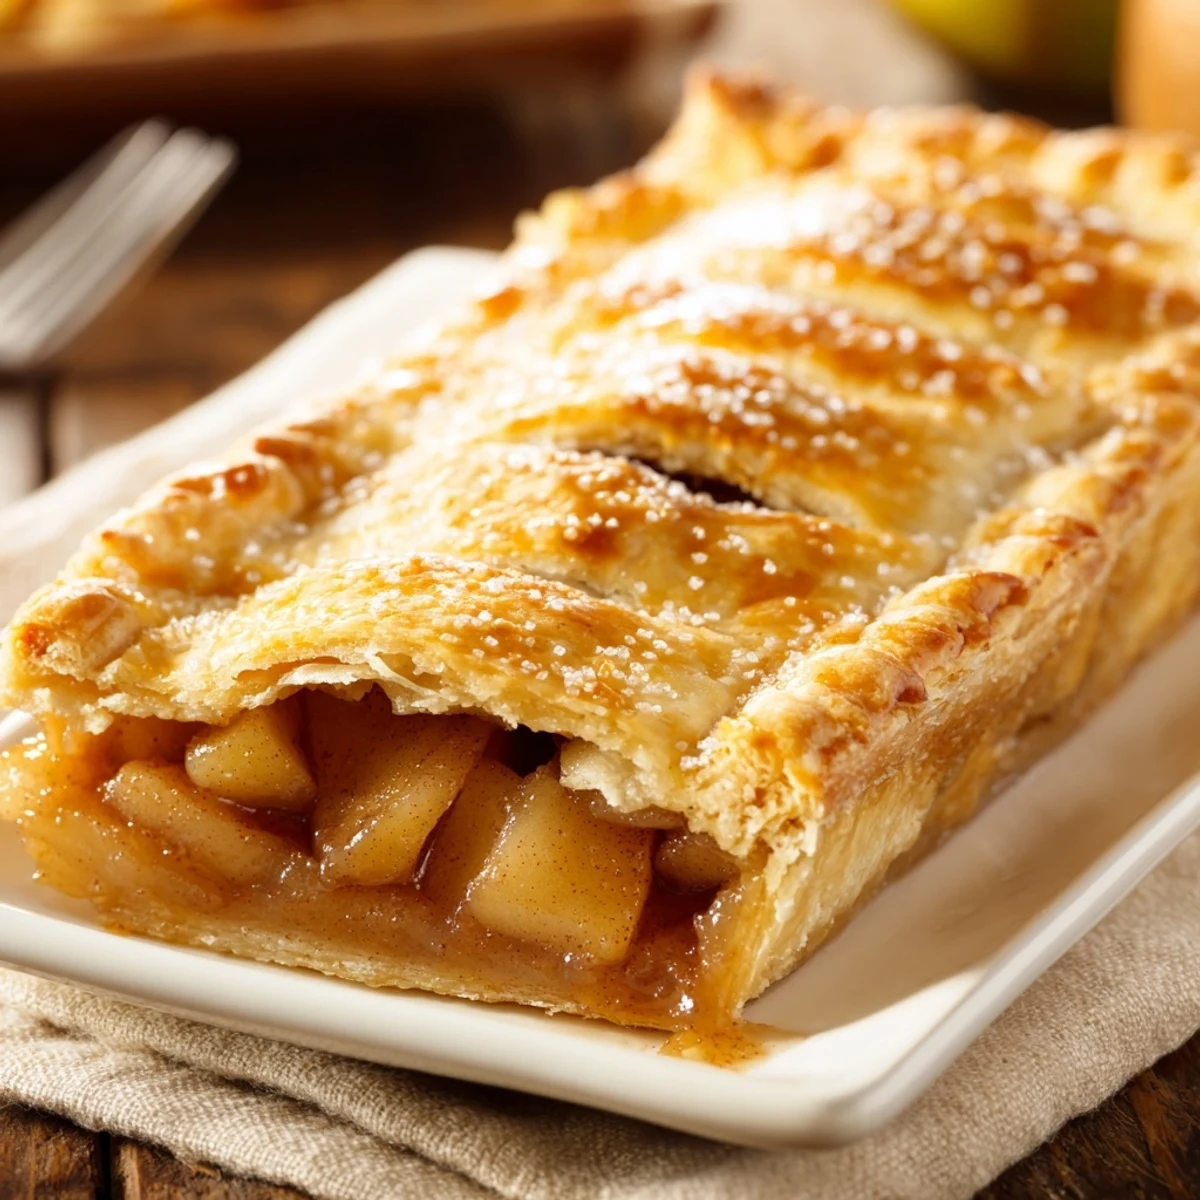
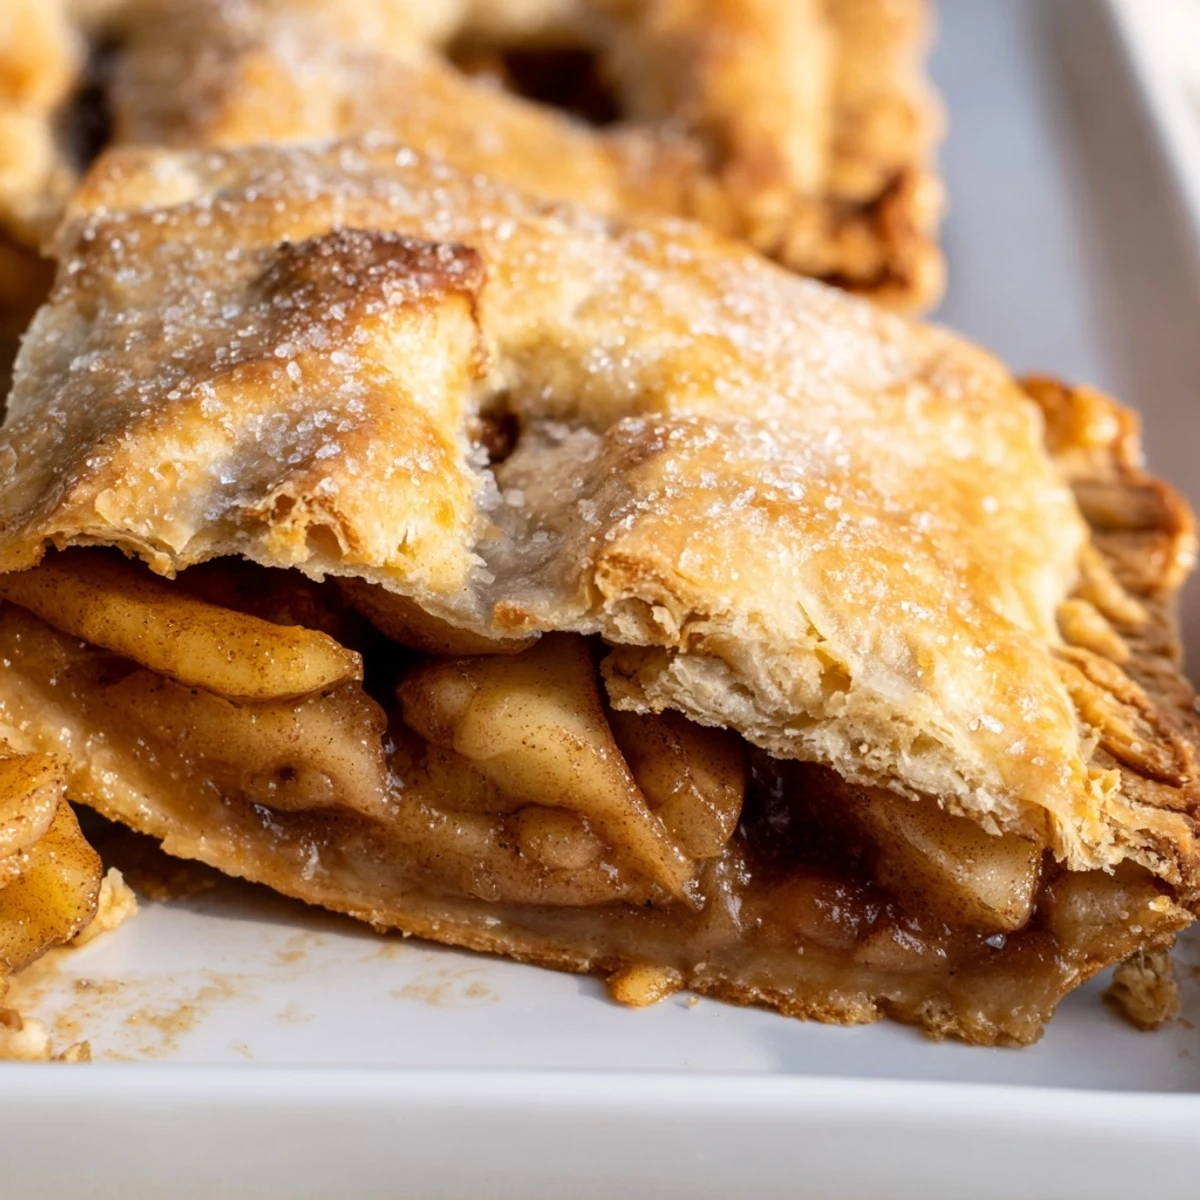
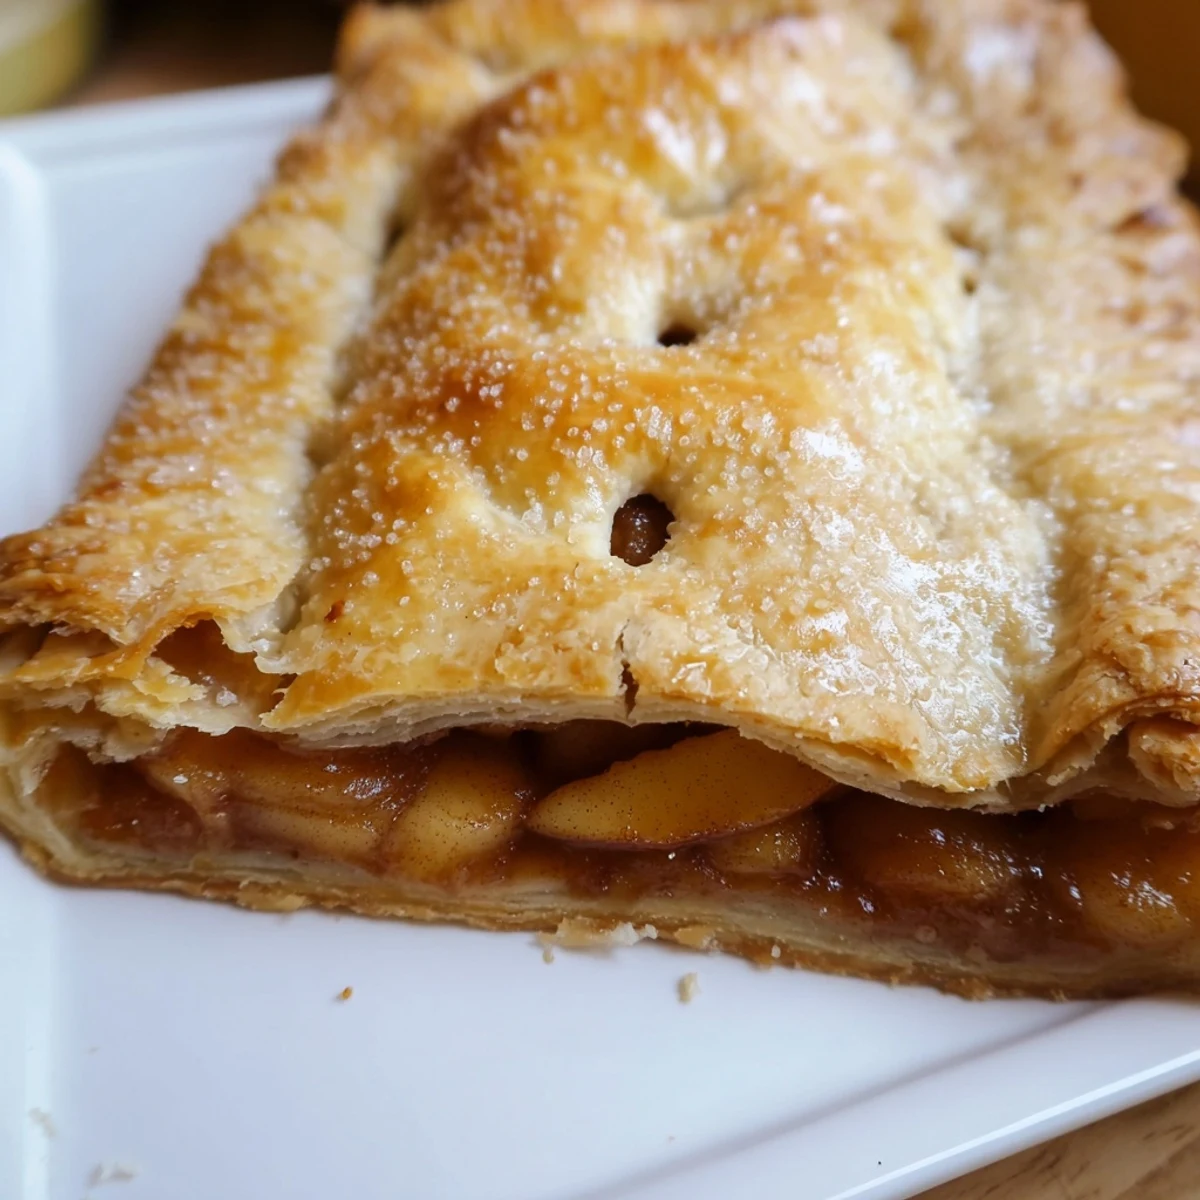
Save This apple slab pie features a buttery, golden crust that encases layers of spiced, tender apples. The rectangular shape makes it perfect for feeding crowds, with each square serving offering the ideal ratio of crust to filling. A blend of Granny Smith and Honeycrisp apples provides balance between tart and sweet, while cinnamon and nutmeg create warm, cozy flavors. The finished bakes beautifully with a glossy egg-washed top that's optionally sprinkled with coarse sugar for extra crunch and sparkle.
The first time I made a slab pie for my sister's annual fall gathering, I was running late and crust-covered, but the moment I pulled that golden rectangle from the oven, something shifted. Everyone clustered around the pan, watching steam curl up through those little slits I'd cut, and suddenly the chaos of the morning dissolved into warmth and anticipation. That evening, as we passed around those perfect little squares, I realized this unpretentious format—more sharing, less fuss—had somehow become my favorite way to celebrate apple season.
Last Thanksgiving, my niece claimed the corner piece with the most crimped crust before the pie had even cooled properly. Watching her sneak back for 'just one more square' three times during dessert taught me that slab pie has this magical way of making everyone feel like they're getting the best part.
Ingredients
- All-purpose flour: The backbone of your crust—measuring correctly here makes the difference between tender and tough
- Cold unsalted butter: Keep it icy cold and cube it yourself for those flaky layers we're chasing
- Ice water: Add it gradually, and trust your hands more than the exact measurement
- Granny Smith and Honeycrisp apples: This combo gives you brightness from one variety and sweetness from the other
- Both granulated and brown sugar: The brown sugar adds caramel depth that white sugar alone can't achieve
- Cornstarch: This is your insurance policy against soupy filling, especially with juicier apples
- Lemon juice: Brightens the filling and helps those apples hold their shape during baking
Instructions
- Preheat your oven and prep the pan:
- Get your oven to 400°F and line a 10x15-inch rimmed baking sheet with parchment, or give it a quick greasing. This size matters—going smaller means overflow disaster.
- Make the crust dough:
- Whisk flour, sugar, and salt in a large bowl, then work in cold butter until you see coarse, pea-sized crumbs. Drizzle in ice water gradually, mixing just until the dough holds together when pinched.
- Roll out the bottom crust:
- Divide dough in half, making one piece slightly larger. Roll the larger piece on a floured surface and carefully transfer it to your pan, pressing it up the sides to create a snug vessel.
- Prepare the apple filling:
- Toss sliced apples with both sugars, spices, salt, cornstarch, and lemon juice until every piece is coated. Let this sit for about 5 minutes while you roll the top crust.
- Assemble the pie:
- Pour apples evenly over the bottom crust, roll out the remaining dough, and place it on top. Trim and pinch the edges to seal, then cut a few strategic slits for steam to escape.
- Add the finishing touches:
- Whisk the egg with milk and brush it generously over the top crust. A sprinkle of coarse sugar here creates this gorgeous, crackly finish that makes people think you've been practicing pastry for years.
- Bake until golden:
- Bake for 35 to 40 minutes until the crust is deeply golden and you can see the filling bubbling actively through those vent slits. The smell alone will tell you when it's close.
- Let it cool before slicing:
- Allow the pie to cool for at least 30 minutes—this is the hardest part but absolutely essential. Slicing too soon gives you a beautiful but tragic mess on the cutting board.
 Save
Save My friend Sarah once tried rushing the cooling process and ended up serving apple soup with a side of crust. Now we laugh about it every autumn, but honestly, that mistake taught me more about patience than any cooking class ever could.
Getting That Perfect Crust Every Time
After years of pie-making disasters, I discovered that handling the dough as little as possible and keeping everything cold—your hands, your tools, your ingredients—is what separates frustration from celebration. Sometimes I'll even chill my rolling pin in the freezer for 10 minutes before starting.
Apple Varieties That Shine
I used to stick with whatever apples were on sale, but experimenting with mixes changed everything. Half Granny Smith for structure and half Honeycrisp or Pink Lady for sweetness has become my go-to combination, though Braeburns work beautifully too if you find good ones at the market.
Make-Ahead Magic
The beauty of slab pie is how well it plays with your schedule. You can assemble the entire pie the night before, refrigerate it, and bake it fresh the next morning. The crust might need an extra 5 minutes in the oven if it's been chilled, but that smell filling your kitchen while everyone else is still making coffee is worth the slight adjustment.
- Wrap the assembled pie tightly if refrigerating overnight to prevent the dough from drying out
- Leftovers reheat surprisingly well in a 325°F oven for about 15 minutes
- This pie freezes beautifully before baking—just add an extra 10 minutes to the bake time from frozen
 Save
Save There's something about serving slab pie that feels more generous, more abundant, than its round counterpart. Maybe it's that everyone gets an edge piece, or maybe it's just how easily it gathers people around the pan, seconds flowing as naturally as conversation.
Recipe FAQs
- → What type of apples work best?
-
Granny Smith and Honeycrisp apples are ideal because they hold their shape during baking and provide a perfect tart-sweet balance. You can also use Braeburn, Jonagold, or Pink Lady apples.
- → Can I make the dough ahead of time?
-
Yes, prepare the dough up to 2 days in advance and refrigerate wrapped tightly. Bring to room temperature for about 15 minutes before rolling out for easier handling.
- → How should I store leftovers?
-
Cover tightly with foil or plastic wrap and keep at room temperature for up to 2 days. For longer storage, refrigerate for up to 5 days. Reheat gently at 325°F for 10-15 minutes.
- → Can I freeze this?
-
Freeze unbaked assembled pie for up to 3 months. Bake from frozen, adding 10-15 minutes to baking time. Baked squares can also be frozen individually in airtight containers.
- → Why is my filling runny?
-
Make sure to let the pie cool for at least 30 minutes before slicing. The cornstarch needs time to set as the filling cools. Also ensure you've measured cornstarch accurately.
- → What size pan do I need?
-
A 10x15-inch rimmed baking sheet (also called a jelly roll pan) is essential for this recipe. The raised edges prevent juices from spilling during baking.