 Save
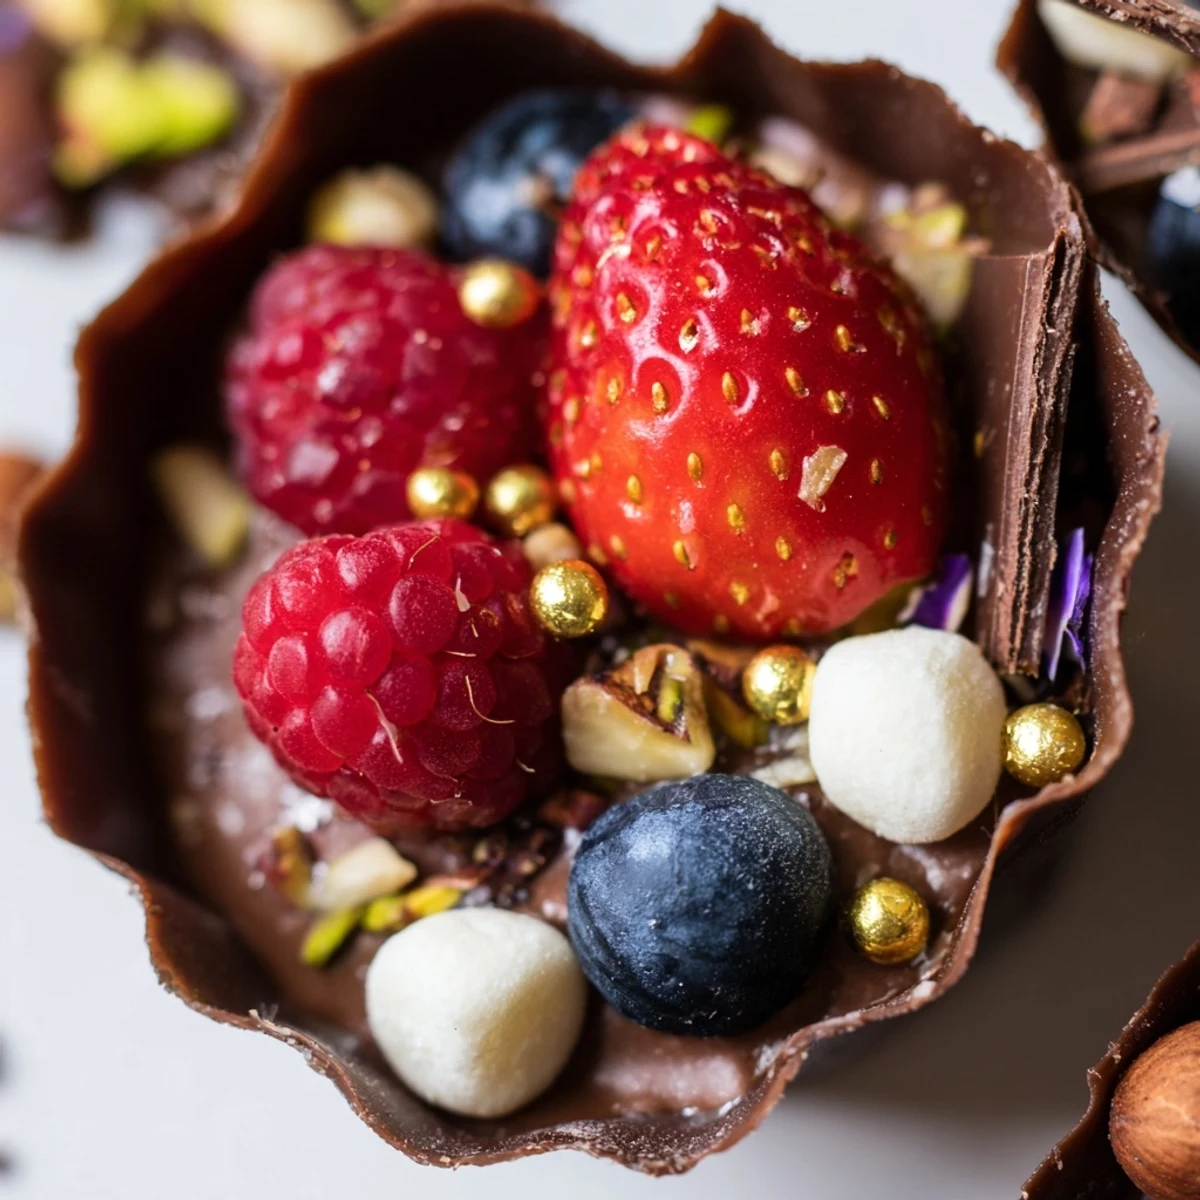
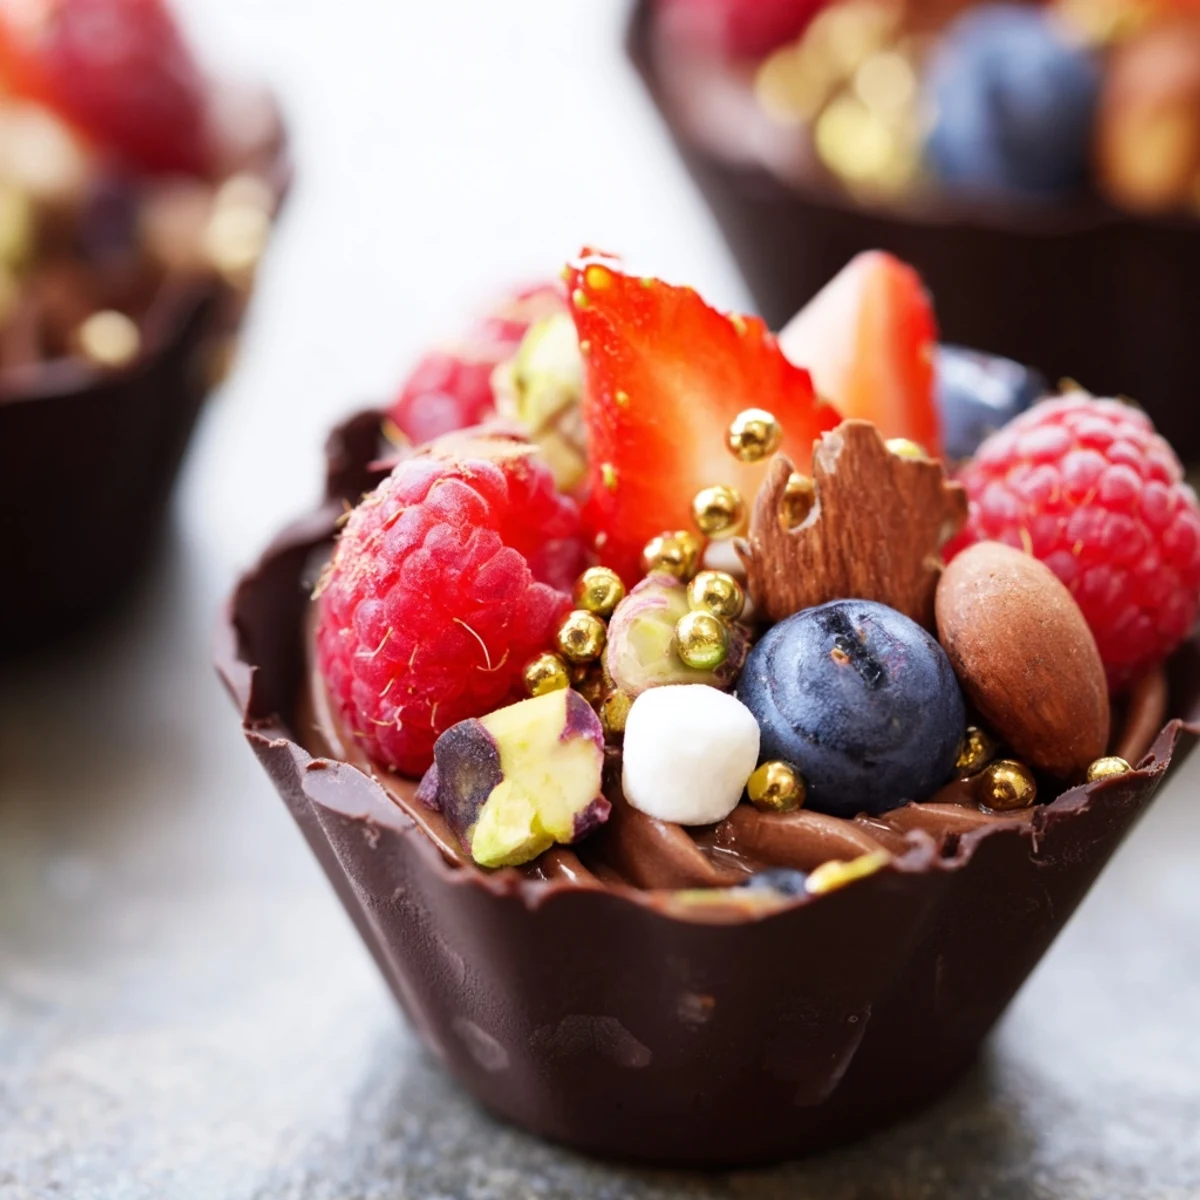
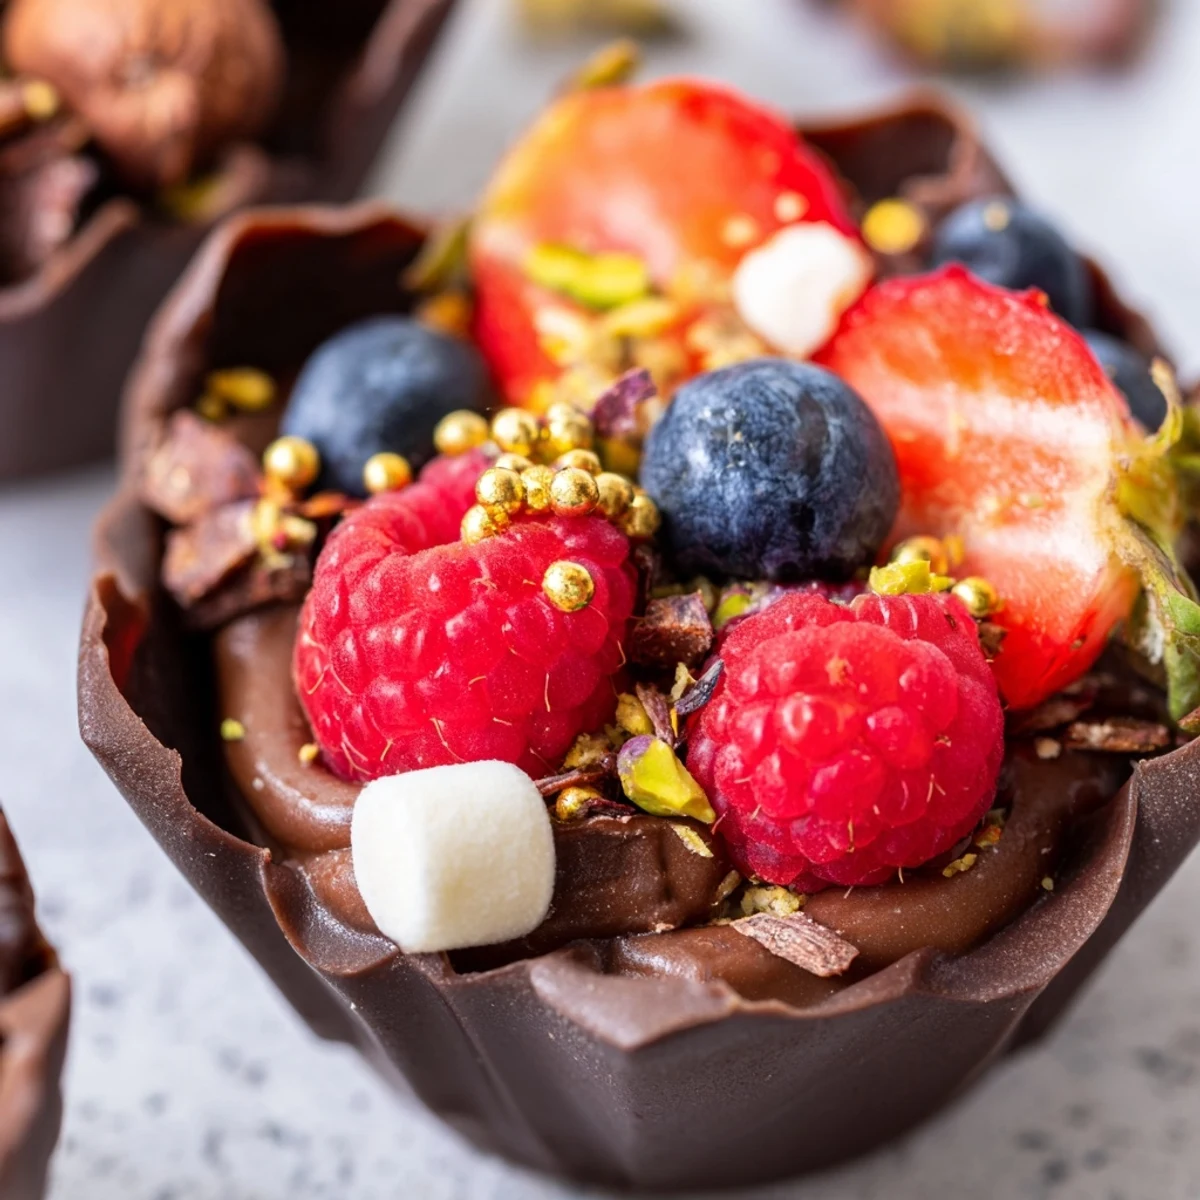
Save These elegant chocolate grazing cups feature handmade edible chocolate vessels filled with silky dark chocolate mousse. The individual portions are crowned with fresh mixed berries, crunchy chopped nuts, mini marshmallows, and chocolate curls. Each cup takes about 35 minutes of active preparation before chilling, yielding six stunning desserts perfect for dinner parties, celebrations, or luxurious dessert tables.
The handmade chocolate cups create an impressive presentation while the mousse offers intense chocolate flavor balanced by tart berries and nutty crunch. Optional edible gold adds an extra touch of sophistication.
The first time I attempted chocolate cups, my kitchen looked like a crime scene from Willy Wonka's factory. Chocolate was everywhere except where it was supposed to be. But that moment when I finally peeled away the liner and revealed a perfect, glossy cup? Pure magic. These grazing cups became my go-to for dinner parties because they make guests feel spoiled without me spending hours at the stove.
Last Valentine's Day, I made these for my cooking club and watched full grown adults fight over who got the cup with the most gold leaf. The best part was seeing how differently everyone approached their cups. Some went methodical, layering berries first. Others just dove in face first. Theres something wonderfully interactive about food that encourages playing with your dessert.
Ingredients
- Dark chocolate (at least 60% cocoa): The higher percentage gives structure to your cups while the mousse needs quality chocolate for that silky texture that doesnt turn grainy
- Heavy cream: Very cold cream whips up faster and holds air better, giving your mousse that cloud like consistency
- Powdered sugar: Dissolves instantly into the cream without leaving grittiness that granulated sugar would cause
- Vanilla extract: Pure extract makes a noticeable difference in rounding out the intense chocolate flavor
- Fresh mixed berries: The tartness cuts through the rich chocolate while adding bright pops of color and juice
- Chopped nuts: Toast them lightly beforehand for an extra layer of flavor that people cant quite identify
- Mini marshmallows: These add texture contrast and a whimsical touch that makes the cups feel playful
- Chocolate curls or shavings: Use a vegetable peeler on a room temperature chocolate bar for effortless curls
Instructions
- Craft the chocolate cups:
- Melt the chocolate in 30 second bursts, stirring between each, until completely smooth and glossy like liquid silk. Coat your liners using the back of a spoon or pastry brush, working quickly before the chocolate begins to set and thickens unevenly.
- Chill until set:
- Place the coated liners on a baking sheet and refrigerate for at least 20 minutes until the chocolate is firm and releases easily from the liners. Peel them away gently, starting at the edges and working slowly to avoid cracking your delicate cups.
- Whip the cream:
- In a chilled bowl (I stick mine in the freezer for 10 minutes), beat the cream with powdered sugar and vanilla until soft peaks form that barely hold their shape. Dont over whip or the mousse will turn grainy and dense instead of airy and light.
- Make the mousse:
- Fold a dollop of whipped cream into your slightly cooled melted chocolate to lighten it before gently incorporating the chocolate mixture into the remaining cream. Use a spatula and fold with a light hand, stopping just when combined to keep all that air you whipped in.
- Assemble your cups:
- Fill each chocolate cup about two thirds full with mousse, then arrange your toppings in beautiful little clusters that make each cup unique. Chill everything for at least 20 more minutes so the mousse firms up slightly and the flavors meld together.
 Save
Save My niece now requests these for every birthday, claiming regular cake is boring compared to picking through her own chocolate cup. Watching her carefully decide which berry goes on top has become my favorite part of the tradition. Food should be fun, and these cups never fail to make everyone smile.
Make Ahead Magic
The chocolate cups and mousse can both be prepared a day in advance and stored separately in the refrigerator. I learned this the hard way after assembling everything the night before a party and waking up to sad, wilted berries. The assembly takes minutes when the components are ready, making this actually stress free for hosting.
Flavor Variations
White chocolate cups with raspberry mousse became a summer staple after I accidentally bought white chocolate instead of dark. The contrast was stunning and guests went wild for the combination. Milk chocolate works beautifully too, especially if youre making these for anyone who finds dark chocolate too intense.
Serving Suggestions
Set up a toppings bar and let guests customize their own cups its interactive and guarantees everyone gets exactly what they want. Include unexpected options like crushed pretzels, coconut flakes, or even tiny meringues for variety. The fun is in the personalization.
- Arrange cups on a mirrored tray or cake stand for extra elegance
- Offer small tongs or spoons so guests can add extra toppings themselves
- Keep a few extra unfilled cups handy in case any break during serving
 Save
Save These little cups of happiness have turned more ordinary Tuesdays into something worth celebrating than any fancy dessert I've ever made. Sometimes the most memorable food is the kind that makes everyone feel like a kid again.
Recipe FAQs
- → How far in advance can I make the chocolate cups?
-
The chocolate cups can be prepared up to 2 days in advance and stored in an airtight container at cool room temperature. However, it's best to fill them with mousse and toppings the same day serving to maintain optimal texture and prevent the chocolate from softening.
- → Can I use white chocolate instead of dark chocolate?
-
Absolutely. White chocolate works beautifully for both the cups and mousse, creating a creamier, sweeter profile. You can also create marble effects by swirling dark and white chocolate together in the cups. Keep in mind white chocolate softens faster, so chilled serving time may be needed.
- → What other toppings work well with these cups?
-
Beyond berries and nuts, consider fresh whipped cream dollops, crushed cookies, toasted coconut flakes, candied citrus peel, sea salt flakes, or drizzles of caramel or fruit sauces. Seasonal fruits like pomegranate seeds or sliced figs create gorgeous presentation variations.
- → My chocolate cups keep cracking when I remove the liners—what am I doing wrong?
-
Cracking usually happens when the chocolate is too cold or the layer is too thin. Ensure your chocolate layer is at least 2-3mm thick. Let the cups sit at room temperature for 2-3 minutes before peeling away liners gently. If chocolate seems brittle, it may have seized—use fresh chocolate and avoid getting water in it during melting.
- → Can I make these without silicone liners?
-
Yes, you can use small silicone molds, balloon-dipping technique for bowl shapes, or paint melted chocolate onto the outside of paper cups chilled on a tray. Alternatively, use small glass bowls as molds, though this creates thicker cups. Paper cupcake liners work but may leave textured patterns on the chocolate.
- → How do I store leftovers?
-
Store assembled cups in the refrigerator for up to 24 hours, though the chocolate may start to soften and lose its snap. For best results, store unfilled chocolate cups at room temperature and prepare mousse separately, assembling just before serving. The mousse alone keeps 2-3 days refrigerated in an airtight container.